Cookie
Electronic Team uses cookies to personalize your experience on our website. By continuing to use this site, you agree to our cookie policy. Click here to learn more.

VirtualBox USB dongle passthrough: Detailed How-to Guide

Olga Weis Olga Weis Apr 19, 2023

When it comes to running various operating systems with specific hardware, virtualization technologies sure have lots of benefits to offer. However, more often than not, professional software requires a USB license dongle to function. So anyone running such apps on virtual machines will inevitably come across a common problem: VirtualBox’s poor USB dongle support.

Although you can set up a USB passthrough to VirtualBox for USB dongles, this will only work for the dongles attached to the host machine directly.

From this article, you will find out how to grant your virtual machines operating in VirtualBox access to USB keys. Plus, you’re going to learn about the most convenient way to connect numerous USB dongles to virtual machines that reside on completely different hosts.

Software for VirtualBox USB dongle redirection

Donglify is an advanced software solution that allows users to redirect USB license dongles from Windows to VirtualBox VMs, both running on the same host and other machines.
Donglify
Start your free trial today
7-day Trial • Cancel anytime.
4.5 Rank based on 198+ users
Read all reviews
Available on Windows 7/8/10/11, Server 2008 R2/2012/2016/2019/2022, Windows 10/11 on ARM, macOS 10.14+
Already a Donglify user? Sign In →

Donglify works over the TCP/IP network and that helps to avoid the common limitations of VirtualBox. USB license dongle becomes accessible from a VM as easily as if it was connected to said VM directly.

How to enable USB dongle in VirtualBox

1
Sign up for your Donglify account.
2
Install Donglify on the host that has a USB dongle physically connected to it (server) and all the VirtualBox virtual machines (clients) that will connect to the shared dongle.
 install donglify
3
On the server, run Donglify and sign in with your account credentials.
 sign to your donglify account
4
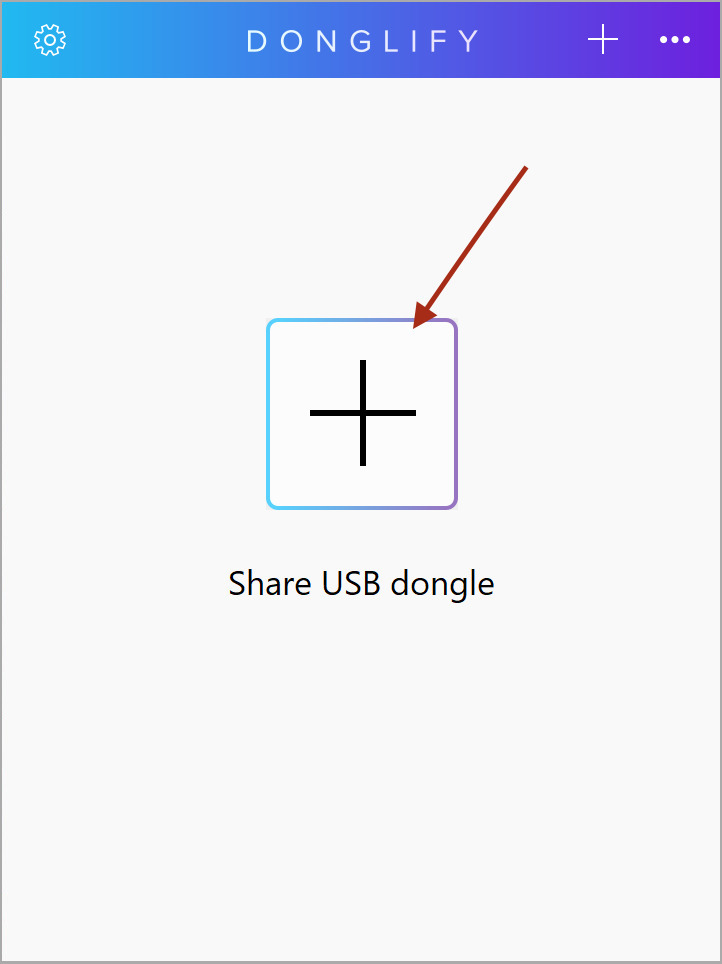
Click "+" to open a list of connected USB license keys, check the radio button next to your USB dongle and click "Share".
 share usb dongle to virtualbox
5
On the client computer, run Donglify, sign in to your account, find the shared USB dongle in the list and click "Connect".
 connect to shared usb dongle from virtualbox
6
Once the connection is established, the dongle will be displayed in the Device Manager as though it was connected physically, and you will be able to use the USB token on VirtualBox virtual machine.

For video instructions on how to share USB dongles to VirtualBox VMs with Donglify, please refer to this guide:

Share dongles

Things to consider when connecting USB dongles to VirtualBox with Donglify

Having an Internet connection is a must

Even if all your machines are on the same LAN, they must be connected to the internet to share and connect USB dongles.

Cross-platform connectivity between Windows and Mac

Since recently, Donglify is not Windows application exclusively. But please mind that to share your dongle keys to Mac machines, you’ll need to install the newest version of Donglify.

Niche expertise in USB dongles

Donglify was specifically designed for USB dongle sharing and is not intended for use with any other USB device type.

How to add a USB Devices to VirtualBox

In a virtual environment, USB is not always plug-and-play, despite its popular image. To make things work, you’ll have to talk almost directly to the hardware via a series of software layers, and the more layers — the trickier is the process.

You can capture a USB device in the VirtualBox guest system in two different ways:

On-the-fly: using the icon on the bottom of the window or the menu "Devices → USB → ...". You’ll see "✓" next to the captured devices in the list.

Using a USB filter: (more reliable) instantly captures a dongle inserted into the host, provided that a VM is already up and running. Works best if you have a filter for each device.

Out of these two options, USB filters are regarded as more reliable and effective in the majority of cases.


Note: When working with Linux hosts, make sure you are in the "vboxusers" group, and don’t forget to verify your membership with the "id" command after logouts and reboots, or you won't see any USB devices.

Here is what you need to do before capturing a USB device with a filter:

  1. Verify that your host has an installed Extension Pack (the same version as your VirtualBox) for added virtual USB2 and USB3 host controllers support.

  2. Check your VM settings to be certain that USB2 (EHCI) or USB3 (xHCI) is enabled.

  3. Go to “VM Settings'' → “Port” → “USB” and create a new USB filter in your guest settings (the USB device must be plugged into the host). Delete all values except for the “Name”, “VendorID”, and “ProductID'':

    create new usb filter
    • On Linux hosts, check the output of "lsusb" to find out VendorID and ProductID.
    • On Mac hosts, check the "System Information".
    • On Windows hosts, check the Device Manager.

  4. Unplug the device.

  5. Start the guest you’ve applied the filter to, log in (if you have to), and wait until all hard disk activity stops.

  6. Plug your device and the filter will capture it and pass control to your guest.
Start your free trial today
7-day Trial • Cancel anytime.
Already a Donglify user? Sign In →